






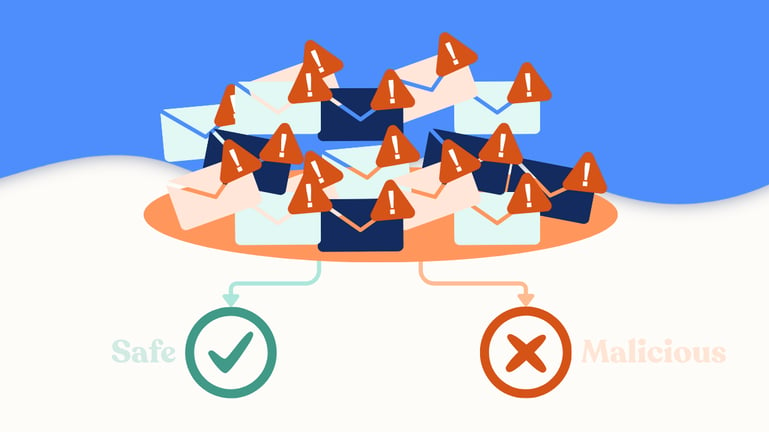
The longer a malicious email remains in an inbox, the greater the chance that somebody else clicks a link, opens an attachment, or falls victim to the scam. At the same time, MSP technicians can’t afford to treat every reported email like a major security incident. Most reported emails turn out to be harmless marketing messages, legitimate business communications, or obvious spam - that’s why effective phishing analysis is all about consistency.
A good triage process helps technicians quickly determine whether an email is safe, suspicious, or malicious without spending unnecessary time chasing every possible indicator. Whether you're a new L1 technician learning the ropes or a senior engineer trying to standardize processes across your team, this guide walks through the key steps involved in reported email triage.
Why Email Triage Matters
Every reported email creates work. A user clicks the Report Phishing button, submits a helpdesk ticket, or forwards a suspicious message to the IT team. From that point onwards, somebody needs to investigate and make a decision.
The goal isn't just to identify malicious emails, but to do so quickly and consistently.
Good email triage helps MSPs:
- Reduce the risk of successful phishing attacks
- Minimize time spent investigating false positives
- Create consistent processes across technicians
- Improve response times during active incidents
- Build trust with users who are reporting suspicious emails
Most importantly, it gives technicians a repeatable process instead of relying on gut instinct. One of the biggest mistakes newer technicians make is looking for a single indicator that proves an email is malicious. In reality, phishing analysis is rarely that simple. Most verdicts come from evaluating multiple pieces of evidence together rather than finding one definitive red flag.
Before You Start: Gather Context
Before diving into the email itself, gather a little context.
Ask:
- Who reported the email?
- Have they clicked any links?
- Opened any attachments?
- Replied to the sender?
- Entered credentials into a website?
- Shared sensitive information?
The answers can significantly change the urgency of the investigation.
An unopened phishing email sitting in an inbox is one thing. An email that has already resulted in credential theft or malware execution is a completely different situation - one which may require immediate escalation - and hopefully, your users know what to do as soon as they’ve done more than open the email.
Step 1: Safely Review the Email
Before analyzing anything, make sure you're doing so safely, wearing a helmet and kneepads (okay, that part is optional). But seriously, never click links directly from a suspicious email. Never open attachments on your local machine. Instead, review the email itself and look for obvious warning signs.
Pay attention to:
- The sender
- The subject line
- The message content
- Any links
- Any attachments
- The overall context
Sometimes the verdict is immediately obvious. A poorly written email claiming to be from Microsoft while asking for gift cards is unlikely to require extensive investigation, but other emails will require deeper analysis.
Step 2: Check the Sender
One of the fastest ways to identify suspicious emails is to compare the display name against the actual sender address.
For example:
Display name: John Smith
Actual sender: john.smith@company-supportt.com
At first glance, many users only see the display name. Technicians should always examine the underlying email address and domain.
Look for:
- Misspellings
- Additional characters
- Lookalike domains
- Unusual country-code domains
- Unexpected external senders
Ask yourself "Would this person normally contact this user from this address?" If not, keep digging.
Step 3: Review the Message Content
Next, evaluate what the email is asking the recipient to do. Many phishing attacks rely on social engineering rather than technical sophistication.
Common red flags include:
- Credential requests
- Password reset requests
- Wire transfer instructions
- Payment changes
- Gift card purchases
- Requests for tax information
- Requests for personally identifiable information (PII)
Also watch for psychological pressure.
Phishing emails frequently create a sense of:
- Urgency
- Fear
- Authority
- Secrecy
Examples include:
"Your account will be disabled today."
"Complete this immediately."
"Don’t discuss this with anyone."
"The CEO needs this urgently."
Even if the technical indicators appear clean, unusual requests should always raise suspicion.
Step 4: Analyze URLs
Links are often where phishing attacks reveal themselves. Rather than clicking links directly, inspect them safely using your security tools.
Look for:
- Domain mismatches
- Shortened URLs
- Suspicious redirects
- Newly registered domains
- Login pages that imitate trusted brands
A common trick involves displaying one URL while directing users somewhere entirely different.
For example:
Visible text: microsoft.com Actual destination: microsoft-security-login-verify.com
These discrepancies are often strong indicators of phishing activity.
Where possible, run URLs through:
- Threat intelligence platforms
- URL reputation services
- Sandboxes
- Security scanning tools
Step 5: Analyze Attachments
Attachments deserve special attention because they can deliver malware directly to a user's device.
Review:
- Filename
- File extension
- File type
- Whether the attachment was expected
An unexpected invoice, shipping document, or PDF from an unknown sender should immediately raise questions.
Common attachment types used in attacks include:
- ZIP files
- HTML files
- Office documents with macros
- Executable files
- Password-protected archives
Never open suspicious attachments locally. Instead, use sandboxing or scanning tools to safely evaluate them.
Step 6: Review Email Headers
Email headers provide technical information about how a message was sent and authenticated. While they can appear intimidating at first, technicians don’t need to become email engineers to use them effectively.
Three of the most important authentication checks are SPF, DKIM, and DMARC.
SPF (Sender Policy Framework)
SPF helps verify whether the sending server is authorized to send email on behalf of a domain. If an email claiming to come from a company originates from an unauthorized server, SPF may fail.
DKIM (DomainKeys Identified Mail)
DKIM uses a cryptographic signature to verify that an email hasn’t been altered during transmission. A valid DKIM signature suggests the message was authorized by the sending domain.
DMARC (Domain-based Message Authentication, Reporting and Conformance)
DMARC builds on SPF and DKIM and allows organizations to define how receiving systems should handle authentication failures. It helps reduce domain spoofing and impersonation attacks.
What Header Results Actually Mean
This is where many newer technicians make mistakes. A failed SPF, DKIM, or DMARC result can support a suspicious or malicious verdict. However, a passing result doesn’t automatically make an email safe. Attackers regularly compromise legitimate accounts and infrastructure.
A phishing email sent from a legitimate Microsoft 365 account may pass all authentication checks while still being malicious. Headers are one piece of evidence, not the final verdict.
Not sure what tools you should have in place to prevent phishing attacks? Download the Ultimate Phishing Prevention & Response Checklist:
/Screenshot%202025-07-10%20at%202.21.06%20PM.png?width=264&height=182&name=Screenshot%202025-07-10%20at%202.21.06%20PM.png)
Step 7: Review Communication History
Context matters. Check whether the sender and recipient have communicated before. Questions to ask include:
- Have these people exchanged emails previously?
- Is the request consistent with past conversations?
- Has the sender suddenly changed behaviour?
- Does the timing make sense?
Some phishing attacks involve compromised accounts. In those cases, the sender may be completely legitimate, but the message content is malicious. Communication history can often reveal these anomalies.
Step 8: Put the Evidence Together
One of the biggest mistakes technicians make is relying on a single indicator. Good phishing analysis looks at the complete picture.
Consider:
- Sender reputation
- Email content
- Authentication results
- URLs
- Attachments
- Communication history
No single indicator should make the decision for you. Instead, use all available evidence to determine the overall risk level. Think of the investigation as building a case rather than searching for one magic answer.
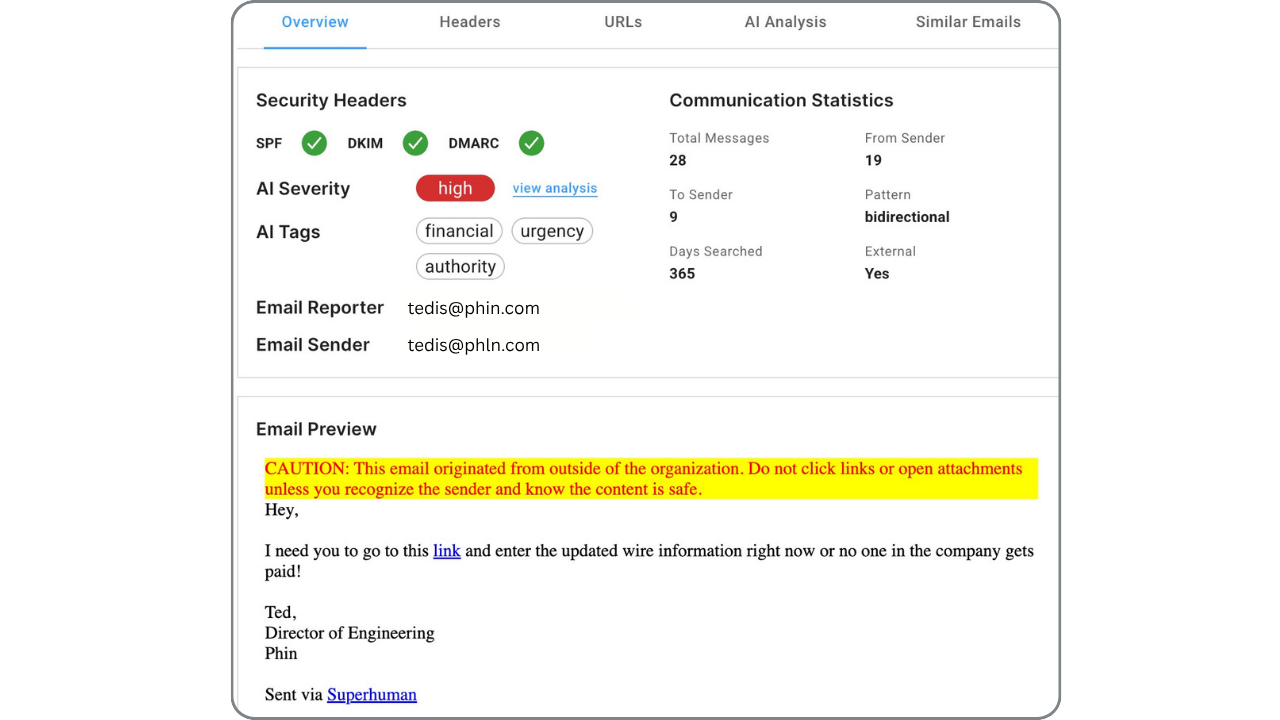
With tools like Phinbox IQ, you can get all of this information in one place instead of having to run around like a chicken with its head cut off.
Make a Verdict
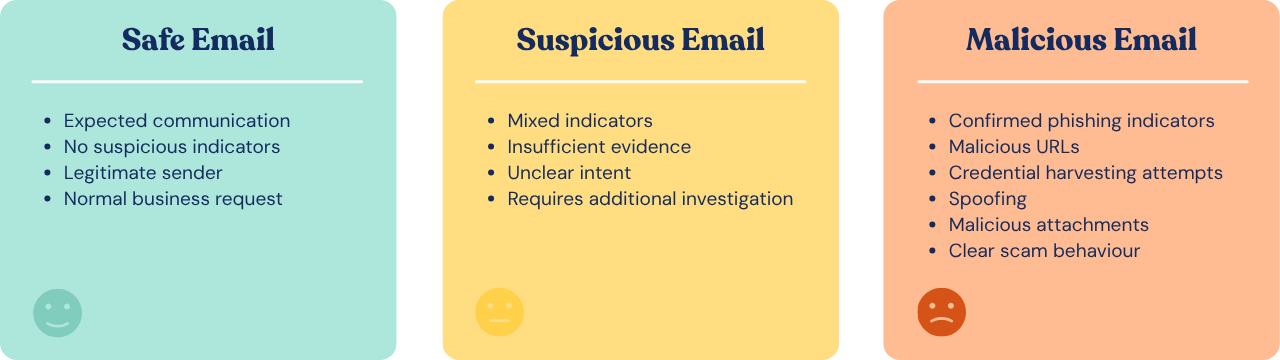
At this stage, the email will typically fall into one of three categories.
Safe
Characteristics:
- Expected communication
- No suspicious indicators
- Legitimate sender
- Normal business request
Action: Close the ticket and thank the user for reporting it.
Suspicious
Characteristics:
- Mixed indicators
- Insufficient evidence
- Unclear intent
- Requires additional investigation
Action: Escalate or continue reviewing.
Malicious
Characteristics:
- Confirmed phishing indicators
- Malicious URLs
- Credential harvesting attempts
- Spoofing
- Malicious attachments
- Clear scam behaviour
Action: Follow your incident response process.
This may include:
- Removing emails from inboxes
- Blocking senders or domains
- Quarantining similar messages
- Resetting credentials
- Alerting affected users
- Documenting the incident
When Should an L1 Escalate?
Not every email can or should be handled by an L1 technician.
Escalation is appropriate when:
- A user entered credentials
- Malware execution is suspected
- Business email compromise indicators exist
- Multiple users received the message
- Sensitive information may have been exposed
- You can’t confidently determine a verdict
A useful rule of thumb:
If you’ve gathered the evidence but still can’t confidently classify the email, escalation is usually the right next step. Escalation shouldn’t be viewed as a failure. The purpose of triage is to gather enough information to make a decision or determine that additional expertise is required.
How Long Should Email Triage Take?
The answer depends on the complexity of the email.
As a general guideline (though it varies depending on your tools and process):
- Obvious safe emails: 2 to 5 minutes
- Standard phishing investigations: 3 to 10 minutes
- Complex investigations: escalate rather than spending 30+ minutes digging
Consistency is more important than speed. However, if every reported email is taking 20 to 30 minutes to investigate, your team will quickly become overwhelmed as reporting volumes increase.
Effective reported email triage isn’t about finding one perfect indicator. It is about following a repeatable process that helps technicians evaluate risk consistently and make informed decisions.
The best analysts aren’t necessarily the people with the deepest technical knowledge. They are often the people who follow a structured process, gather the right evidence, and know when to escalate.
As phishing attacks continue to evolve, having a standardized approach and tools that make phishing analysis easy becomes increasingly important for MSPs looking to scale their security operations.
How to Standardize Your Process for 5x Faster Phishing Analysis
Phinbox IQ can drop phishing analysis from 15 to 30 minutes per email to 5 minutes or less. Use this e-guide to learn how to streamline reported email triage without sacrificing accuracy.

Leave a comment: